All operating systems allow users to format the hard drive. Once formatting is performed, all data in the hard drive will be erased including the operating system. Technically, the data will be gone and you will be able to use the full space of the hard drive to your purposes. However, the formatted data can still be retrieved. Formatting also checks the hard drives for errors. Both magnetic platter and SSD drives can be formatted.
Once the formatting is complete, the user will have to reinstall the operating system. It may take a few hours to complete. Formatting is usually the last resort when virus infections in the computer cannot be quarantined. If the data is too corrupt, formatting will erase viruses and everything else with it. However, it is recommended to back up and store all required data before formatting the system.
Partitioning
Before you format and use a hard drive (internal and/or external) for backup, it needs to be partitioned. You can either divide your drive into sections of specific sizes or just use it with a single encompassing the full size of the drive.
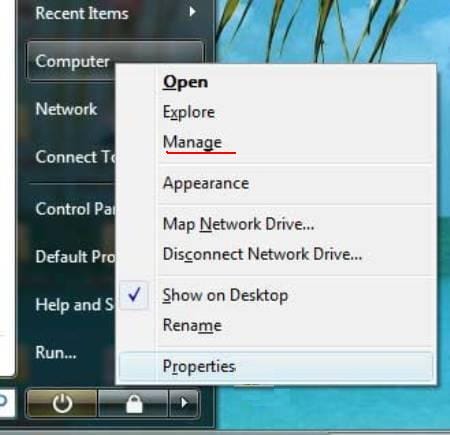
Step 1: Click Start button
Step 2: Right click on ‘Computer’ and select ‘Manage’
Step 3: Under ‘Storage’, click Disk Management which can be found in the left pane. Tip: If your drive has a size of more than 2 TB, select GPT. If it doesn’t, select MBR. Drives that are not partitioned come with black bars and the ‘Unallocated’ label. Partitioned drives come with blue bars and drive letters.
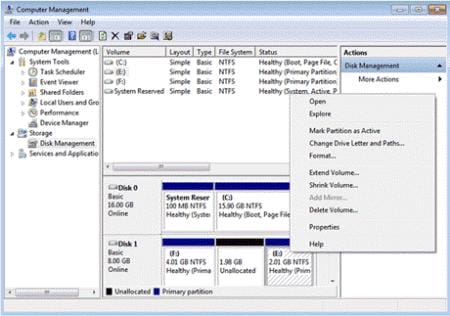
Step 4: Right click the black bar
Step 5: Select New Simple Volume (where Volume means Partition)
Step 6: Click Next in the Window that appears
Step 7: Specify the size of your preference in MB. To use the drive as one whole section, without dividing into multiple sections, specify the same size as the maximum disk size in MB.
Step 8: Click Next
Step 9: Now give it a drive letter of your choice and click ‘Next’
Step 10: Select ‘Format this volume’. If you plan to use the computer with other Windows machines, select ‘NTFS’. If you plan to use the computer with Macs, then choose exFAT. Make sure that the allocation unit size is at default.
Step 11: Now you have to provide a name for the partition under Volume label
Step 12: Make sure that you haven’t selected ‘Perform a quick format’ or ‘Enable file and folder compression’
Step 13: Click ‘Next’
Step 14: Double check and confirm the selections you have made before clicking ‘Finish’
Formatting for a Windows installation
Step 1: Insert the Windows Installation disc or ‘Restore’ disc in the disc drive
Step 2: Now click Start button and select ‘Restart’
Step 3: Boot the PC from the disc that you inserted
Step 4: Follow the prompts to start the restoration procedure
Step 5: If you are using an installation disc, select the language
Step 6: Accept the Windows terms and conditions for license
Step 7: Select Custom from Advanced options, if and when prompted
Step 8: Delete partitions that you don’t want with the Delete option in Drive options, after selecting the partition
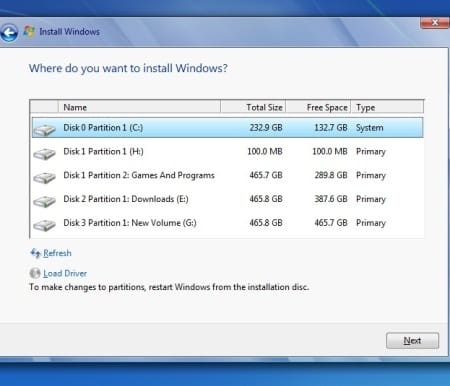
Step 9: Click the un-allocated space to select and then go to ‘Drive options’
Step 10: Now select ‘New’. This is to create a new partition
Step 11: Select ‘Format’ once you are done specifying the size of the new partition
Step 12: Click ‘Next’ to start the Windows installation, once formatting is complete. The system is now fully formatted erasing all the data in the hard drive.
Conclusion
Once the formatting is complete and Windows has been installed, you can restore the backup that you have created and stored in an external drive. Although the format erases data in the hard drive, they can still be recovered to a certain extent by using simple recovery tools.